The Accovod web browser is specifically designed for users managing multiple social media accounts across platforms like VK, Facebook, Google, and LinkedIn.
Ideal for webmasters, it allows for efficient control over multiple groups, managing content, and interacting with posts and reviews.
To fully utilize Accovod for such purposes, using proxy servers is essential, as this setup enhances the ability to manage various accounts without restrictions.
Below, we will demonstrate how to use this program with proxy servers. Accovod supports various operating systems, including Windows, macOS, Linux, and mobile devices.
Step 1: Create a New Profile and Enter Proxy Details
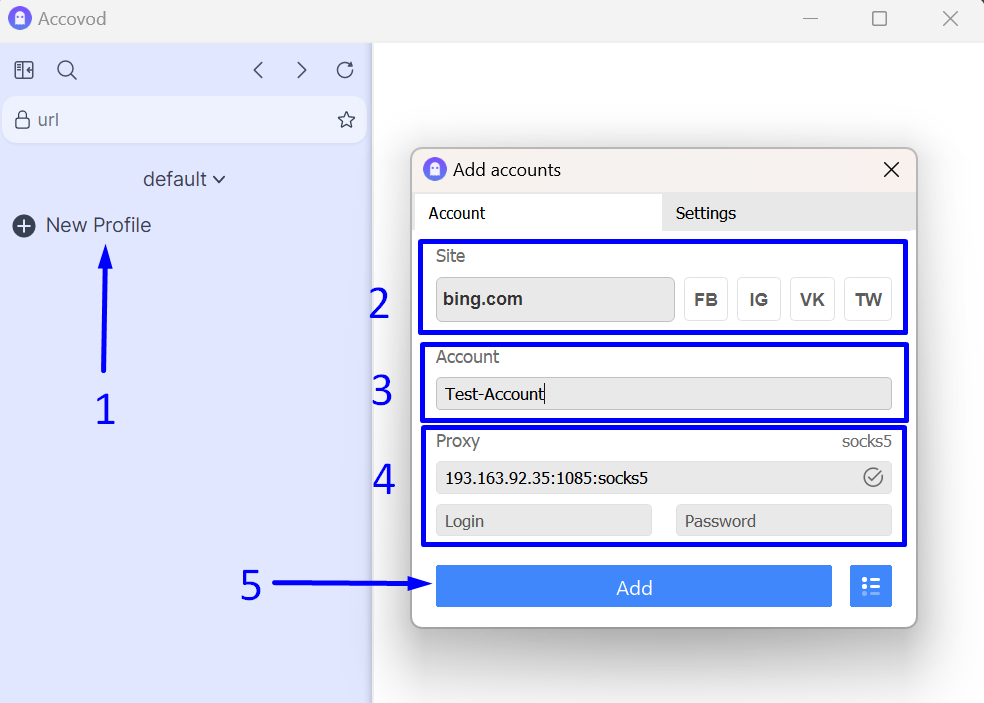
To create a new profile and add specific proxy server details, follow these steps:
- Create a new profile by clicking on “New Profile” on the left side of the program.
- Enter the name of the desired website or choose from several offered sites/social networks.
- Invent a memorable name for the profile being created.
- Enter the IP address, port, and protocol of your proxy in the format:
ip:port:protocol
We recommend using the SOCKS protocol if possible.
- Click the “Add” button to save the newly created profile.

Step 2: Manage Your Profiles
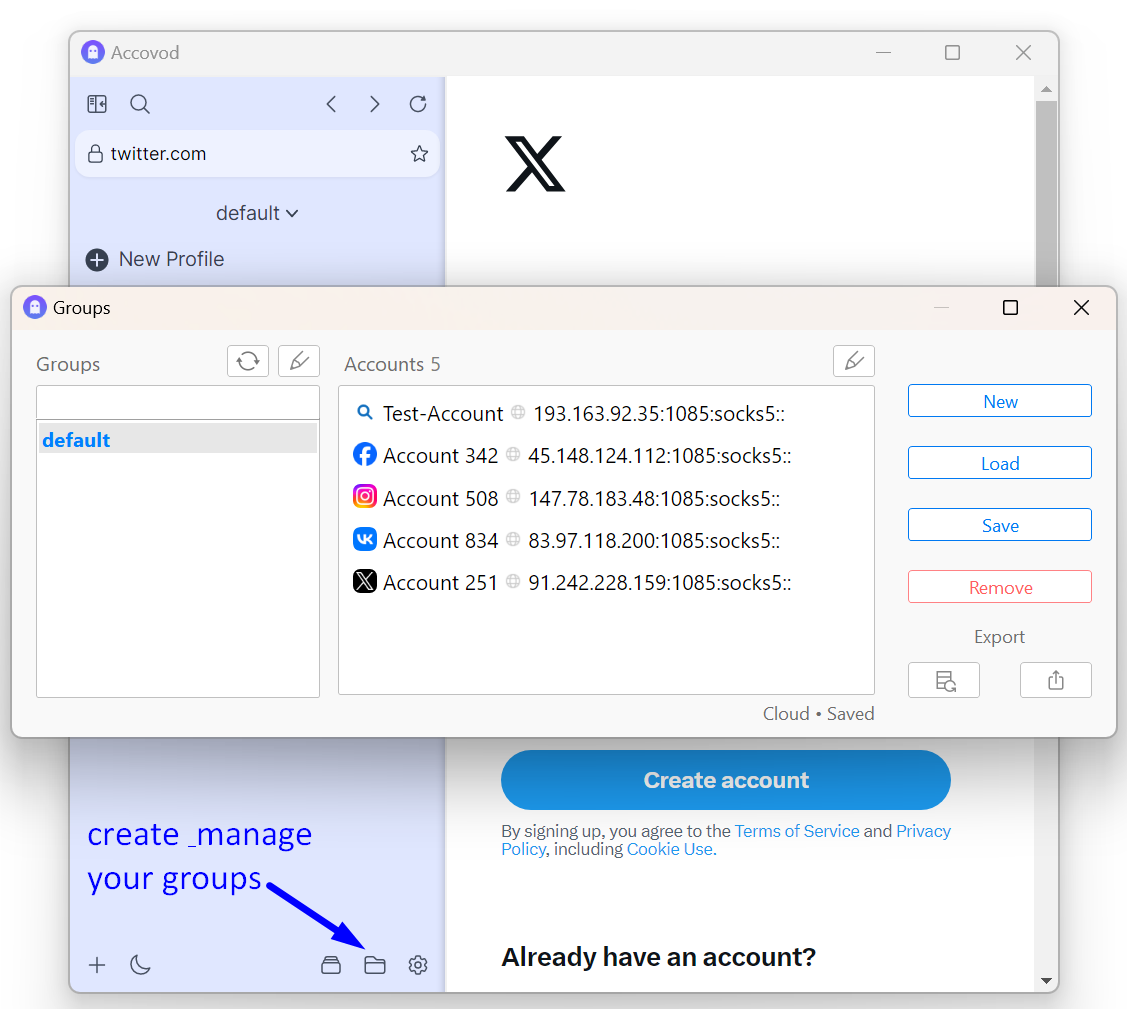
You can manage groups of created profiles using various features in Accovod.
To see which specific proxy servers have been added to which profiles, click on the folder icon.
This allows you to ensure that none of the proxy servers are duplicated for the same site to prevent your accounts from being blocked.

Now your Accovod is "charged" with profiles and protected by proxy servers.
Wishing you successful work and high traffic!
https://proxycompass.com/knowledge-base/setting-up-a-proxy-in-the-accovod-browser/
Keine Kommentare:
Kommentar veröffentlichen